If you’re wondering how to repot a ZZ plant, you’ve come to the right place!
In this guide, we’ll walk you through the essential steps to successfully repot your Zamioculcas Zamiifolia, ensuring it thrives in its new home.
Step 1: Signs It’s Time To Repot Your ZZ Plant

Repotting is a crucial part of ZZ plant care. Over time, as the plant grows, it can become rootbound, meaning the roots have filled the pot and have no room to expand.
This can lead to stunted growth and other health issues. Knowing how to repot a ZZ plant properly can help ensure its continued health and vitality.
When you notice roots emerging from the drainage holes, if the watering frequency increases drastically or the plant appears to be outgrowing its pot, it’s time to repot.
The process involves carefully removing the plant from its current pot, trimming the roots if necessary, and placing it in a new pot that allows for growth.
Step 2: Wrapping ZZ Stems
Before you begin the actual repotting process, it’s essential to prepare the plant. Start by wrapping the stems of the ZZ plant with paper or soft material.

This step is important as it protects the stems from damage during the handling process. Secure the wrapping with tape or staples, ensuring that the stems are upright and safe.

This protective measure not only keeps the plant secure but also makes it easier to manage when removing it from the pot. A little preparation goes a long way in ensuring a smooth repotting experience.
Step 3: Removing The Rootbound ZZ Plant
Once the stems are secured, it’s time to remove the plant from its pot. If the plant is particularly rootbound, you may need to cut the pot to free it.

Use sharp pruners or a knife to gently cut away the pot material, being careful not to damage the roots. This step may require some strength, especially if the roots are tightly packed.
After freeing the plant, take a moment to examine the root system. Healthy roots should be white and firm, while brown or mushy roots may indicate rot. If you encounter any unhealthy roots, trim them away to promote healthy growth.
Step 4: Choosing The Right Size Pot
Choosing the right pot is critical for the health of your ZZ plant. Aim for a pot that is a bit wider and deeper than the previous one. I prefer to use a pot that is 5-7” bigger as ZZ plant roots grow fast.
This additional space allows the roots to expand and grow without becoming rootbound again too quickly.
However, be cautious not to choose a pot that is excessively large, as this can lead to overwatering and root rot.
When choosing a pot, prioritize one with good drainage. A well-draining pot will help prevent excess moisture from accumulating around the roots.
Step 5: Trimming ZZ Plant Roots
Before placing the ZZ plant into its new pot, it may be necessary to trim the roots. This step is essential, especially if you notice any very long or damaged roots.

This pruning encourages healthier growth and prevents the plant from becoming rootbound again too soon.
After trimming, gently loosen any tightly packed roots to promote better soil contact and drainage. This will help the plant acclimate more effectively to its new environment.
Step 6: Transplanting ZZ Plant Into New Pot
Now it’s time to transplant the ZZ plant into its new pot. Begin by adding a layer of fresh, well-draining potting mix to the bottom of the pot.

Ensure you add enough soil to position the plant properly in the pot—not too low and not too high.
Position the plant in the center and fill in around the sides with more potting mix.


This initial watering is important for helping the plant adapt to its new home.
Step 7: ZZ Plant Acclimation
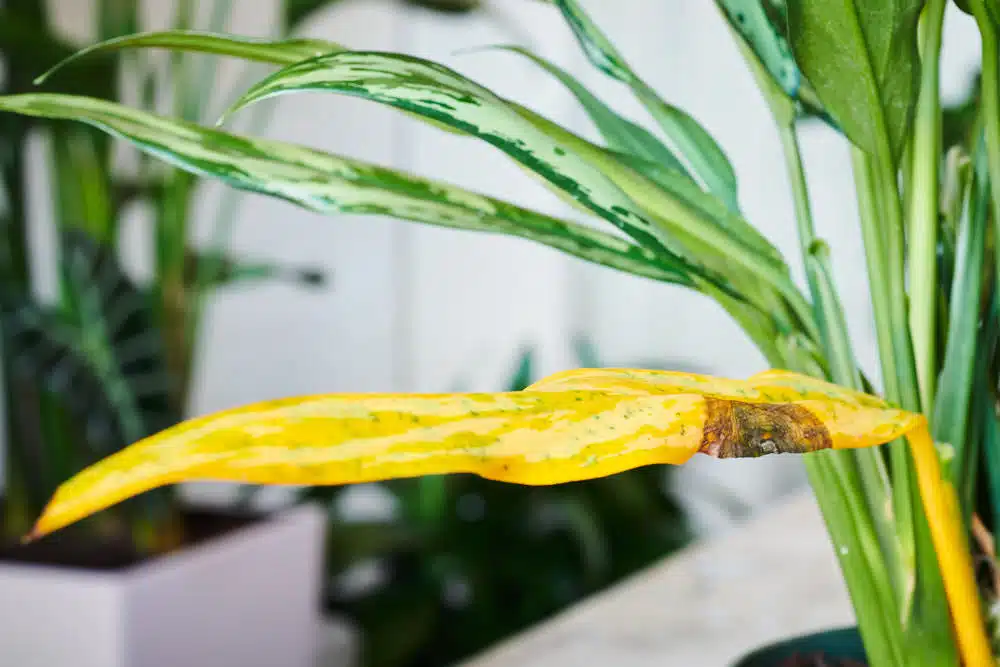
After repotting, your ZZ plant will go through a period of acclimation. This phase is essential as the plant adjusts to its new environment. During this time, you may notice lower leaves turning yellow or other minor changes.
These yellowing leaves are expected and often a sign of stress from the transition. If you see any yellow leaves, simply trim them away using sanitized scissors. Keeping the plant clean and free of debris will also help it acclimate better.
Step 8: Trimming ZZ Plant Leaves
As part of the maintenance routine, trimming your ZZ plant leaves is vital for its health. Regular trimming not only enhances its appearance but also encourages new growth.
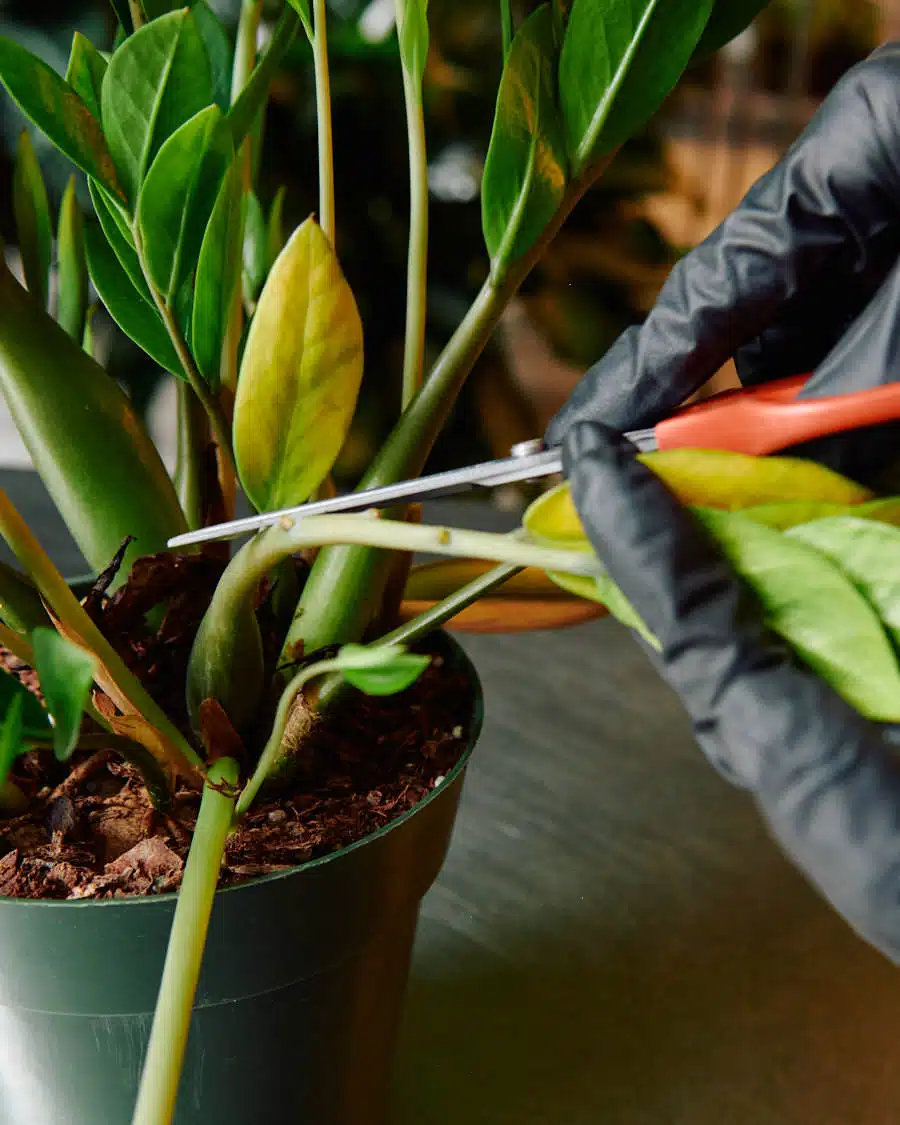
Use clean, sharp scissors to make precise cuts. Always sanitize your tools before use to prevent the spread of disease. Aim to remove only the affected leaves to maintain the overall integrity of the plant.
Step 9: Supporting ZZ Plant Stems
Support is important for the stability of your ZZ plant, especially after repotting.
If the stems appear weak or are leaning, consider adding stakes for support.

Carefully insert the stakes into the soil near the stems and secure them gently.
You can also use soft ties to attach the stems to the stakes, ensuring they remain upright as they grow. This will prevent any bending or breaking of the stems as the plant matures.
Step 10: Cleaning ZZ Plant Leaves
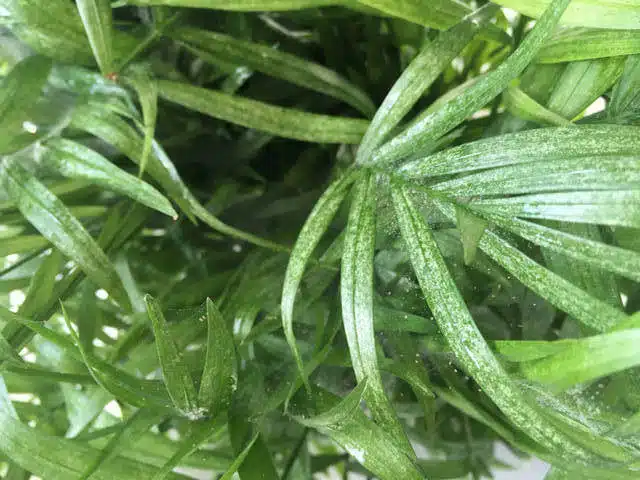
Cleaning the leaves of your ZZ plant is a simple yet effective way to ensure its health.
Dust can accumulate on the leaves, blocking sunlight and affecting photosynthesis.

Regular cleaning not only improves light absorption but also helps prevent pest infestations. Make it a habit to check the leaves when watering or during your routine maintenance to keep your plant looking vibrant and healthy.
FAQ: Common Questions About Repotting ZZ Plants
How often should I repot my ZZ plant?
Generally, repotting every 2-3 years is sufficient, or when you notice it becoming rootbound.
Can I use the same pot for ZZ plant repotting?
It’s best to choose a pot that is a few inches larger in diameter to provide adequate space for growth.
What signs indicate that my ZZ plant needs repotting?
Signs include roots emerging from the drainage holes, stunted growth, or a noticeable increase in watering frequency.
Should I water my ZZ plant immediately after repotting?
Yes, watering helps settle the soil around the roots and provides the necessary moisture after the stress of repotting.
How can I encourage my ZZ plant to grow more branches?
ZZ plants may grow slowly if they lack sufficient light, and nutrients, or are in an oversized pot. To encourage more branches:
Provide Adequate Light: Place your plant in medium to bright indirect light.
Feed Your Plant: Fertilize during the growing season (March to September) with a balanced, diluted fertilizer.
Proper Pot Size: Ensure the pot isn’t too large.
My ZZ plant’s leaves are turning yellow. What should I do?
Yellowing leaves often indicate improper watering. Here’s what you can do:
Check Watering Schedule: Allow the soil to dry out completely between waterings.
Use a Moisture Meter: This helps prevent over or under-watering. Test the soil every 10-14 days. When the meter reading is in zone 1, wait for 1-2 more weeks and then water the plant.
Remove Yellow Leaves: Prune them to encourage new growth.
Fertilize Appropriately: Feed your plant during the growing season.
Should I bury the bulbs/tubers when repotting my ZZ plant?
Yes, when repotting, cover the bulbs (rhizomes) with soil. They should be planted deep enough so the bulbs are not exposed above the soil surface.
Can I prune bent stems instead of supporting them?
Absolutely! Pruning bent or elongated stems helps maintain a fuller shape. If you prefer not to use stakes, pruning is a great option.
Will my ZZ plant eventually stand upright without stakes?
“Cascading” stems are natural for ZZ plants. Shorter stems might straighten over time, but longer stems typically need support. If you prefer an upright appearance, stakes are recommended.
Where can I purchase plant stakes for my ZZ plant?
You can find support stakes here.
Is it okay if stakes go through the potato-like roots?
It’s best to avoid piercing the rhizomes (bulbs). Minor root damage might not harm the plant, but it’s advisable to insert stakes carefully to prevent injury.
My ZZ plant isn’t absorbing water well, and the leaves are thin and dry. What should I do?
If water runs straight through:
Bottom Watering: Place the pot in a tray with water for 15-20 minutes to allow the soil to absorb moisture.
Check for Root Bound: If severely root-bound, consider repotting into a larger pot.
Avoid Winter Repotting: If it’s winter, you might want to wait until spring to reduce stress on the plant.
What soil base should I use for superb drainage? My ZZ plant has white mildew.
A well-draining soil mix is essential. Consider:
Soil Mix: Use a potting mix with added perlite or coarse sand.
Address Mildew: Remove the top 3 inches of affected soil and replace it with fresh, dry soil.
Avoid Overwatering: Ensure the soil dries out completely between waterings.
Is it possible to buy a ZZ plant as large as the one in your video?
Yes, mature ZZ plants are available in 14″ or 16″ nursery pots. Check with local nurseries or specialty plant stores.
How long did it take for your ZZ plant to grow that large, and do you have special care tips?
This plant is about 3 years old. Tips for healthy growth:
Regular Feeding: Fertilize during spring and summer. I use this All-Purpose Fertilizer.
Rotate the Plant: Ensure even light exposure on all sides.
Prune as Needed: Trim overgrown stems to maintain shape.
Leaf Cleaning: Use a microfiber glove or a damp cloth to keep leaves dust-free.
Preventative Care: Apply Neem Oil lightly every 2-3 weeks during the growing season (spring-summer).
How can I propagate my ZZ plant?
You can propagate ZZ plants through:
Division: Separate the rhizomes and plant them individually.
Stem Cuttings: Allow the cuttings to callus, then place them in water until roots develop.
Leaf Cuttings: Carefully cut the leaves and allow them to callus. Then, place individual leaves in water or soil; note that root development may take longer.
Learn more how to propagate ZZ plant in my detail post.
Can I transition my ZZ plant from PON to soil?
If your plant is thriving in PON (Porous Organic Nutrients), it’s best to keep it there. Transferring to soil might stress the plant due to different moisture and nutrient levels.
My ZZ plant’s leaves have a thick brown crust at the base. Is this normal?
Yes, the thick brown covering at the base is a natural protective sheath for new stems. It’s not a pest and can be left as is or removed gently if you prefer.
Should I remove cocoa coir when repotting my ZZ plant?
You can keep the original potting mix (cocoa coir) and simply add fresh, well-draining potting soil around it when repotting.
How do I prevent damaging rhizomes when inserting stakes?
Use thinner stakes or place them carefully near the edge of the pot. If space is limited, consider repotting to provide more room.
What do I do if my ZZ plant blooms?
Congratulations! Blooming is a sign of a happy plant. You can:
Enjoy the Flowers: Let them be if the plant is healthy.
Prune if Necessary: If the plant is young or you prefer it to conserve energy, you can trim off the blooms.
Is it normal for old stems to stop growing?
Yes, older stems may slow down in growth and eventually die off as new stems emerge. Regular pruning keeps your plant looking its best.
How do I make my ZZ plant grow healthy?
Key tips include:
Proper Light: Medium to bright indirect light.
Watering: Allow soil to dry completely between waterings.
Fertilizing: Feed during the growing season.
Cleaning: Keep leaves dust-free to improve photosynthesis.
Check My Care Guide: ZZ Plant Care.
Why hasn’t my ZZ plant grown in a year?
Possible reasons:
Insufficient Light: Ensure it’s getting enough indirect light.
Nutrient Deficiency: Fertilize during the growing season.
Pot Size: If the pot is too large, the plant may focus on root growth.
Is it necessary to remove old soil when repotting?
Not always. You can retain the existing soil, especially if it’s healthy, and add fresh soil around it when moving to a larger pot.
Can I plant a ZZ cutting without roots directly into the soil?
It’s best to root ZZ cuttings in water or a moist medium until roots develop before planting them in soil.
What type of soil do you recommend for ZZ plants?
I recommend using a well-draining potting mix. A peat moss-based mix with added perlite works well. Here’s the one I use: Indoor Potting Mix.