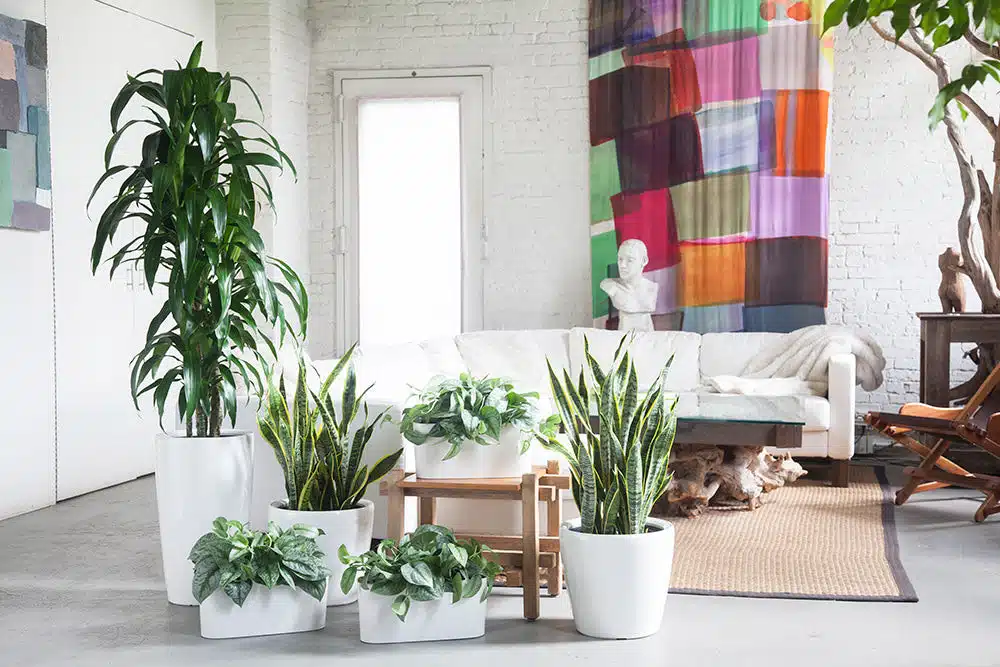

Have you ever felt the panic of realizing you’ve loved your plant a little too much?
I’ve been there, and I’m here to tell you that all is not lost. As a plant care expert who’s nursed countless overwatered plants back to health, I’m excited to share my tried-and-true methods for saving your waterlogged green friends.
Let’s dive into the world of plant rescue and turn those droopy leaves perky again!
Watch my video and learn👆:
- signs of the overwatered plant;
- 2 stages of overwatering;
- what to do if your plant is overwatered;
- how to aerate the soil;
- when it is too late to save your plant;
- how to re-pot overwatered plant;
- how to water plants, so they don’t get overwatered.
For a deeper dive into saving an overwatered plant, check out my detailed guide below 👇
Identifying An Overwatered Plant
Before we jump into rescue mode, it’s crucial to confirm that overwatering is indeed the culprit. I’ve seen many plant parents misdiagnose their plants, leading to further issues. Let’s break down the key indicators.
Signs Of Overwatering
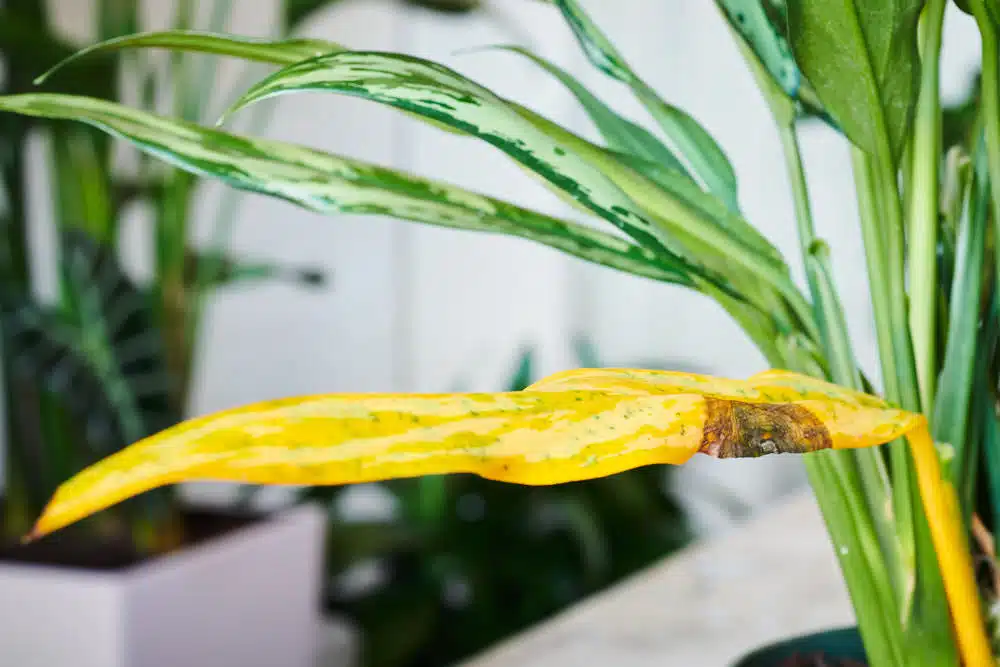
Yellowing or Browning leaves – Changes in leaf color are often my first clue that watering might be an issue!
When I notice leaves turning yellow or brown, it raises a flag. Leaves of overwatered plants typically feel soft, limp, or mushy, while the leaves of underwatered plants feel dry and crispy to the touch, especially at the edges.
Wilting – I also check for wilting, which can be confusing because it’s a symptom of both over and underwatering.
The key difference? Overwatered leaves typically droop or sag, appearing heavy and soft.
In contrast, underwatered leaves also droop but may show signs of drying, browning, or shriveling, especially at the edges, giving the overall plant a less vibrant look compared to overwatered plants.
The differences in appearance can be subtle, so it’s important to consider other factors as well.
Mold on soil – Another visual cue I always check for is mold on the soil surface. If I spot yellow, white, or fuzzy growth, it’s a clear indicator that the soil has been too wet for too long.
Foul smell – Here’s where my nose comes in handy! If I catch a whiff of something funky coming from the soil, it’s a red flag for overwatering. This odor is often caused by root rot, which occurs when the roots are submerged in water for too long, leading to a lack of oxygen and the growth of anaerobic bacteria.
Root Rot – Time for a little plant detective work! If I suspect root rot, I’ll gently remove the plant from its pot to take a closer look. What am I searching for?
Those sneaky dark brown or black, mushy roots that scream ‘help!’ Healthy roots, on the other hand, should feel firm and maybe a lovely shade of white or light brown, depending on the species.
Soggy Soil – This is where I get my hands dirty—literally. I stick my finger as deep as possible into the soil to gauge moisture levels. If it feels soggy or water seeps out when I press down (this often happens with plants that are potted in containers without drainage), that’s a red flag for overwatering.
First Steps For Overwatered Plant Recovery
Once I’ve confirmed overwatering, it’s time to act fast. The quicker you respond, the better chance your plant has of bouncing back.
- Stop Watering 🚫💦
This might seem obvious, but I’ve seen many well-meaning plant owners continue to water out of habit or fear. Trust me, your plant needs a break. I always advise my clients to put the watering can down and step away. Your plant needs time to dry out and recover.
- Remove Excess Water 🌀🫗
If there is standing water in the saucer, it should be removed immediately.
Laying paper towels or newspaper at the bottom of the pot can help wick away excess moisture. Sometimes, I’ll even use a turkey baster to remove any excess water. It’s a simple trick, but it works wonders.
- Relocate the Plant 🪴➡️
Environment plays a huge role in plant recovery. I always move overwatered plants to a spot with bright, indirect light to encourage evaporation.
Additionally, I keep a window open, if the weather permits, or run a fan to ensure good air circulation, which promotes airflow around the soil and helps it dry out more quickly. Maintaining a stable temperature away from cold drafts or heat is also crucial for their recovery.
Remember, stressed plants are more sensitive to extreme conditions, so I’m careful not to shock them with sudden environmental changes.
- Dry Out Overwatered Soil 🌞🌿💨
When it comes to drying out soggy soil, I’ve got a few tricks up my sleeve that have saved countless plants over the years.👇
How To Dry Out Overwatered Soil
Dry Soil Replacement Method
This is one of my preferred methods for quickly addressing severely overwatered plants. Carefully remove as much soil as possible from the top and around the roots of the plant.
Replace it with a dry and fresh soil. The dry soil will help absorb excess moisture and pull water away from the plant roots, promoting a healthier balance of moisture.
This method is effective in situations where overwatering has occurred and can help revitalize your plant’s growing conditions without needing to fully repot.
Absorption Methods
This method includes a few techniques that I use when I need to act quickly but don’t have any fresh, dry potting mix on hand to resolve the situation.
Paper Towel Technique: One of my go-to methods is the paper towel technique. Place the paper towels (or newspaper) directly on the surface of the soil and gently press down. As the paper towels become saturated, replace them with dry ones to continue absorbing excess water.
The Tampon Trick: For more extreme cases, I’ve even used tampons! It might sound unconventional, but they’re incredibly effective at absorbing moisture from the soil. Insert tampons partway into the soil and remove them once they’ve expanded with water.

Rice Method: In dire situations, I’ve employed the rice method, which is suitable only for small plants and should be considered a last resort, as it can be very stressful for them. I would carefully remove the plant from its pot, wrap the root ball (with soil) in paper towels, and bury it in a container of dry rice. The rice acts as a desiccant, drawing out excess moisture from the roots.
The plant should be buried in dry rice for 24 to 48 hours. Important to check the moisture level after 24 hours, and if it still feels wet, leave it for another day. However, avoid prolonged exposure, as this can stress the plant. Once adequately dried, promptly repot it in fresh potting mix to support its recovery.
Aeration Method

Aeration focuses on introducing air to waterlogged roots to promote recovery. These are two effective methods I use:
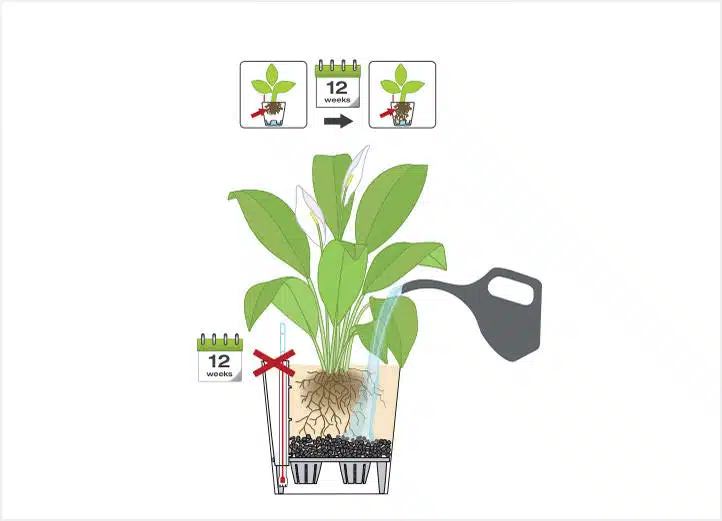
- Soil Poking: Gently poke holes in the soil with the chopstick or insert it where there is no resistance from the roots, pushing as deep as possible. Make circular motions with the chopstick to create openings and fluff up the soil, being careful not to harm the roots.
- Fan: Use a fan to circulate air across the soil surface after aerating the soil. This combination helps speed up evaporation and reduces the risk of mold growth.
The goal is to create an environment where roots can breathe, as oxygen is essential for their health and recovery.
Root Care For Overwatered Plants
When dealing with overwatered plants, root health is paramount. Sometimes, surface-level fixes aren’t enough, and we need to dig deeper—literally.
Assessing Root Health
If you suspect severe overwatering, gently remove the plant from its pot and inspect the roots.
Look for:
- Color: Healthy roots are light-colored; dark or black roots indicate problems.
- Texture: Firm roots are good; soft, mushy roots are bad.
- Smell: A foul, rotting odor is a definite sign of root rot.
Treating Root Rot

If I find root rot, I don’t panic—there’s still hope. Here’s what to do:
- Remove all the soil from the roots.
- Trim away all affected roots using clean, sharp scissors. I recommend using rubbing alcohol to sanitize the scissors before making the cuts. Be thorough to ensure you don’t leave any potentially diseased roots behind.
- After trimming, wash the remaining healthy roots under running water to remove any lingering fungal spores.
- Dip the roots in a fungicide solution to prevent reinfection and promote healing.
- If a large portion of the root system is affected, I suggest considering taking cuttings for propagation as a backup plan. This approach can help give your plant a fresh start.
Remember, treating root rot requires careful attention. I tend to remove more than I might initially think is needed. It’s far better to have a smaller, healthier root system than to risk ongoing decay.
Repotting An Overwatered Plant

Sometimes, the best course of action is to start fresh with new soil and a clean pot. But timing is everything when it comes to repotting a stressed plant.
When to Repot
I consider repotting when:
- The soil remains waterlogged even after attempts to dry it out.
- There’s visible mold or fungal growth on the soil surface.
- I’ve discovered significant root rot.
However, I will always think twice before repotting a severely stressed plant. Sometimes, the shock of repotting can be the final straw for a weakened plant. I assess each case individually, weighing the risks against the potential benefits.
Proper Repotting Technique
- Choose a pot that’s only slightly larger than the current one. A pot that’s too big can lead to overwatering issues in the future.
- Best to use pots with drainage holes. For plants that like consistent moisture, consider using self-watering pots or wicking systems to maintain even soil moisture.
- Use a dry, well-draining potting mix. If I find that the soil I’m using isn’t porous enough, meaning it doesn’t allow water to flow through easily, I would add perlite, vermiculite, or coconut coir to enhance drainage.
- Before repotting, gently shake off as much of the old soil as possible from the roots.
- Place a layer of fresh potting mix at the bottom of the new pot, position the plant, and carefully fill in around the roots, tamping down gently to remove air pockets.
- After repotting, water lightly and place the plant in a location with bright, indirect light to recover.
Aftercare And Recovery
The journey doesn’t end with repotting or treating root rot. Proper aftercare is crucial for full recovery.
Watering

I always advise a ‘less is more’ approach when it comes to watering, especially for recovering plants.
Here is my fool-proof watering technique:
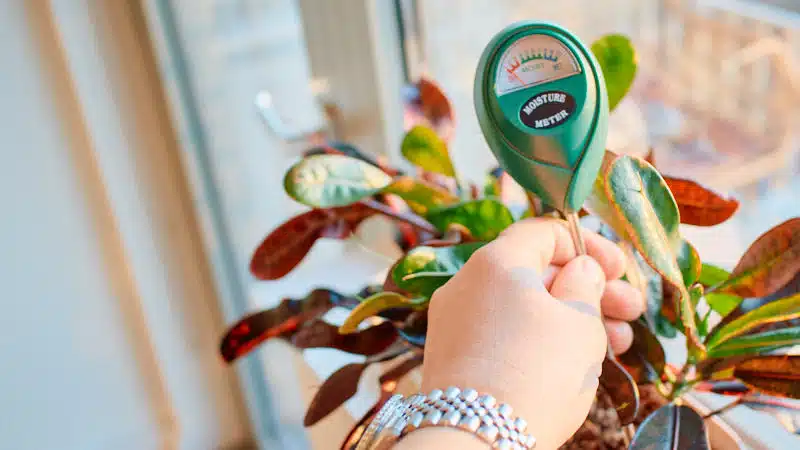
- Always check the soil moisture before watering.
Use your finger or, even better, my favorite tool—a soil moisture meter.
- Test the soil as deep as possible once a week to stay on top of your recovering plant’s needs.
- When the soil is dry enough, water thoroughly until water runs out of the drainage holes.
- Empty any water that collects in the saucer after about 30 minutes.
Watering Guidelines:
- Check Soil Dryness: Wait until the soil is dry enough before watering again.
- Deep Watering: Water deeply but less frequently to encourage deep root growth.
- Bottom Watering: Consider bottom watering to prevent oversaturation of the soil surface, and remove any excess water from the tray or saucer after about 30 minutes.
Monitoring Plant Health
Recovery is a process, and I recommend keeping a close eye on your plants during this time. Here are some key indicators to watch for:
- New Growth: New leaves or shoots are a great sign that your plant is recovering well. It shows that the roots are beginning to re-establish themselves and that the plant is ready to thrive again.
- Improved Leaf Color and Texture: Healthy leaves should be vibrant and full of life. If you notice a return to bright green coloration, this is a positive sign. Conversely, leaves that remain yellow or brown may indicate ongoing stress. Leaf texture should also be firm and smooth; any signs of wilting or drooping could suggest further issues.
- Stability in Soil Moisture Levels: Regularly checking the soil’s moisture levels will help you determine if your watering routine needs adjusting.
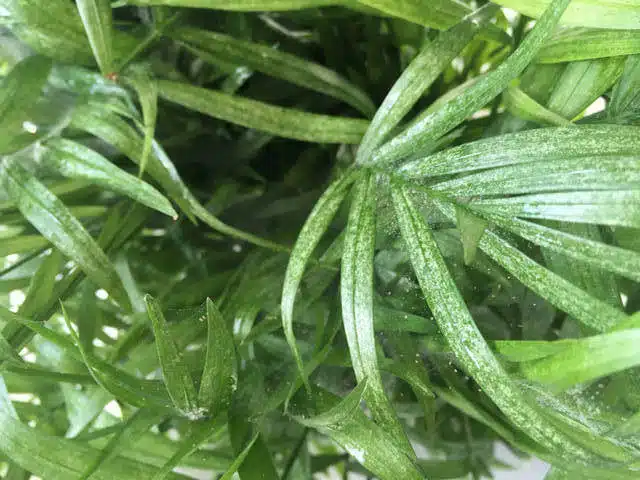
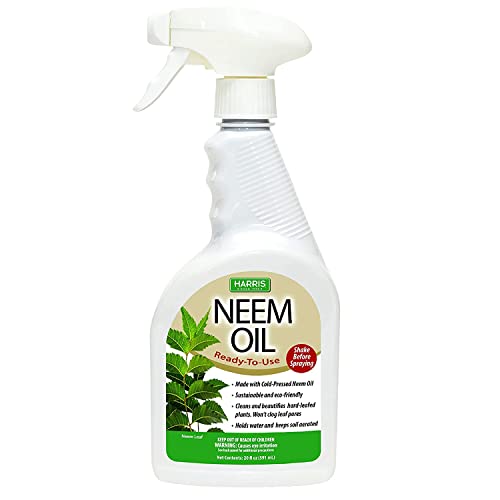
- Pest Checks: As you monitor your plant, keep an eye out for pests. Healthy plants are better able to fend off infestations, but stress can make them more vulnerable. Look for signs of insect activity, such as webbing, white or brown spots on leaves, or sticky residue. Overwatering can invite pests like gnats, mealybugs, or spider mites to infest your plants.
Preventing Future Overwatering
As the saying goes, “Prevention is better than cure.”
Here are my six top tips to help you avoid the overwatering issue:
- Proper Light Environment: Ensure your plants receive the appropriate light for their species. Proper light helps plants photosynthesize effectively, reducing excess moisture and preventing overwatering.
- Good Air Circulation: Ensure your plants have good air circulation around them. This helps to evaporate excess moisture from the soil and foliage, reducing the likelihood of overwatering and fungal issues. Positioning plants near a fan or opening windows can improve airflow.
- Choose Well-Draining Soil: Use a potting mix that allows excess water to escape easily.
- Use Pots with Drainage Holes: This prevents water from pooling at the bottom of the pot.
- Establish a Watering Routine: Avoid watering your plants on a schedule. Instead, test the soil moisture every 7-10 days to help establish a suitable watering frequency. Only water when the soil feels dry enough, and for extra accuracy, consider using a moisture meter.
- Adapt to Seasonal Changes: Keep in mind that seasonal changes can significantly impact your plant’s water needs. During warmer months, plants generally require more frequent watering due to active growth and higher evaporation rates. In contrast, cooler seasons often slow down plant growth, so they typically need less water. However, winter indoor heating can speed up soil evaporation, meaning plants might require slightly more frequent watering. The bottom line: observe your plant closely during seasonal changes to adjust its care as needed.
- Improve Drainage: Improving soil drainage is crucial to prevent issues like root rot and overwatering. Here are some specific tips:
- Add Perlite: Mix perlite into your potting soil at a ratio of about 1 part perlite to 3 parts potting soil. This improves drainage and aeration, preventing soil compaction.
- Add Drainage Material: Place a layer of small stones, gravel, or clay pellets at the bottom of the pot before adding soil to facilitate drainage. This little step really helps with drainage, especially for plants in pots without drainage holes. However, if you can, I strongly recommend using pots with drainage holes.
- Set The Pot Free: Remove any decorative wrapping that might be trapping water! It’s also a good idea to take off decorative soil covers, like moss or rocks, that can block moisture from evaporating.
Product Recommendations For Plant Overwatering Prevention
To help you in your plant care journey, here are some products I love and highly recommend:
1. Soil Moisture Meter: The XLUX T10 Soil Moisture Sensor is an affordable and reliable option for accurately measuring soil moisture. You need just one tool for an unlimited number of plants!

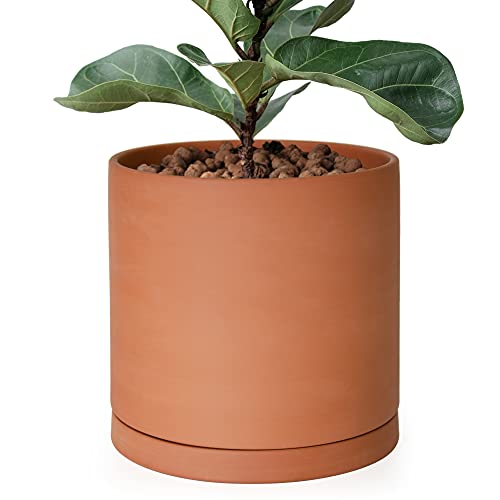
2. My Favorite Pots: When it comes to pots that add a pop of color and style to any decor, I’m all about the Terracotta and Ceramic Planters by D’vine Dev. These have drainage holes and saucers and come in a range of colors and styles that fit and elevate any space.
For self-watering pots, my go-to is Lechuza’s line of modern, elegant planters. Not only do I love their sleek design, but their exceptional sub-irrigation system also provides drainage, delivers oxygen to the roots, and dramatically reduces the frequency of watering!
3. Best Soil Mixes: For a well-draining potting mix, I highly recommend Fox Farm Ocean Forest Potting Soil It’s packed with natural ingredients, has a light, aerated texture that provides excellent drainage while retaining just the right amount of moisture—designed for all container plants!
Another fantastic option is Rosy Soil, which combines organic matter with a balanced nutrient blend and enriched with root-boosting biochar so your plants have everything they need to thrive.
Both mixes create the ideal environment for healthy roots and vibrant growth!
Saving an overwatered plant takes time, but trust me, watching it bounce back is so rewarding! You’ve got this—and so does your plant. So, go forth, save those soggy plants, and become the plant hero you were destined to be.
🌱💧 Happy growing, and may your watering can be forever gentle!
Overwatered Plants: Frequently Asked Questions
Have a question about saving an overwatered houseplant that’s not answered below?👇 Feel free to ask in the comments!
How can I save an overwatered plant?
Plants are stronger than we might think. They will recover if we do not overwater them for long periods and adjust our care quickly when this issue happens. Check the roots for rot, prune any affected roots, and repot the plant in fresh soil with proper drainage. Adjust your watering routine accordingly.
Should I water my plant after repotting it?
Yes, after repotting your plant in fresh soil, you should water it thoroughly. Make sure to use enough water to reach the lower roots. Aerate the soil once a week for the next month to allow more oxygen to get to the roots and help them get stronger.
My plant’s leaves are turning yellow and brown; what should I do?
Yellowing and browning leaves can be signs of improper watering—either overwatering or underwatering. Make sure your pot has drainage, the plant gets enough light, and keep it away from heat and AC. Water when the soil is dry about three-quarters of the way down. You can remove yellow leaves. If most of a leaf is browning, you should cut it off. If just the edges or tips are turning brown, you may simply trim those parts off.
Should I cut off the brown or yellow leaves?
Yes, you can remove yellow leaves. If most of a leaf is browning, it’s best to cut it off. If only the edges or tips are turning brown, you can trim those parts off to help the plant focus its energy on new growth.
How long does it take for an overwatered plant to recover?
It really depends on how much root damage there is. With adjusted care and fresh soil, your plant should recover. Be patient, as the recovery might be slow.
My plant’s stems are turning black from the bottom up, and the leaves are dropping. What’s happening?
This sounds like a root rotting issue due to overwatering. Check the roots for rot, prune any affected areas, and repot the plant in fresh soil with proper drainage. This should help establish a proper watering routine for your plant.
My plant’s leaves are droopy but not brown, and the soil is wet. What should I do?
Droopy leaves with wet soil indicate overwatering. It’s best to take the plant out, examine the roots, trim any damaged parts, and repot it in fresh soil. Ensure the pot has drainage and that the plant is getting good light exposure.
Can I drill holes in a plastic pot for drainage?
Yes, you can drill small holes in the bottom of a plastic pot to improve drainage.
How do I avoid overwatering my plants?
I strongly recommend getting a soil moisture meter. This tool will help you understand when your plant is ready for a drink, helping you avoid overwatering or underwatering. Always test the soil before watering to ensure it’s dry enough.
Should I use a soil moisture meter?
Yes, a soil moisture meter is very helpful for establishing a proper watering routine. It helps you determine the soil’s moisture level deep down, so you can water your plant when it truly needs it.
Should I use an aqua globe for watering my plants regularly?
Aqua globes are great if you’re away for a week or two but shouldn’t be used as the default watering method. Not all plants need the same amount of water. For plants that need less water, watering globes might give them more than they need, leading to root rot.
What should I do if my soil is wet at the bottom but dry at the top?
The topsoil dries out first as it’s exposed to open air. If the lower level of the soil stays wet for too long, you can aerate the soil to help it dry faster. Ensure your plant is in a pot that’s just 2-3 inches larger than the root system. If the pot is too big, the soil won’t dry out as fast as needed, and the roots may start to rot. Also, make sure the pot has drainage.
My plant is overwatered in a glass container; what should I do?
Vessels without drainage put a plant at higher risk of being overwatered. Always test the soil before watering to make sure it’s dry enough. Avoid using too much water—just enough to reach the lower roots—to prevent them from sitting in excess water. Aerate the soil frequently to improve oxygen flow.
What about small worms in the soil?
Earthworms do not harm plants; they actually improve soil aeration!
How can I tell if it’s too late to save my overwatered plant?
It depends on how much root damage there is. If the roots are all rotted, you may need to cut stems and propagate them. Depending on the type of plant, you can propagate in soil or water.
Should I put my overwatered plant in sunlight while it recovers?
Yes, make sure the plant is close to a natural light source. Partial or filtered sun is best. Keep it away from heat, AC, and cold drafts to help it recover.
How do I propagate a plant if it has root rot?
If the roots are severely rotted, you can cut healthy stems and propagate them. Depending on the plant type, you can propagate in soil or water.
My plant’s leaves are yellowing at the bottom. Should I remove them?
Yes, you can remove the yellow leaves at the bottom of your plant. This helps redirect the plant’s energy to new growth.
Share Your Experience!
I’d love to hear how your plant-saving adventures go! 🌱
Have you brought a waterlogged plant back to life? Or maybe you’ve got some secret tricks up your sleeve?
Share your stories and any extra tips in the comments below.
Your wisdom could be just what another plant parent needs to save their leafy friend! 🌿👩🌾